Tester Time: The Square Neck Top from Friday Pattern Company
I had the absolute privilege to test for Chelsea from Friday Pattern Company. The new and improved Square Neck Top.

I don’t usually write blogposts when I test but I just had to share this top because I love it so much. Initially released for knits, this update now includes wovens! Can I get a whoop whoop? No. How about a high five? Thanks!
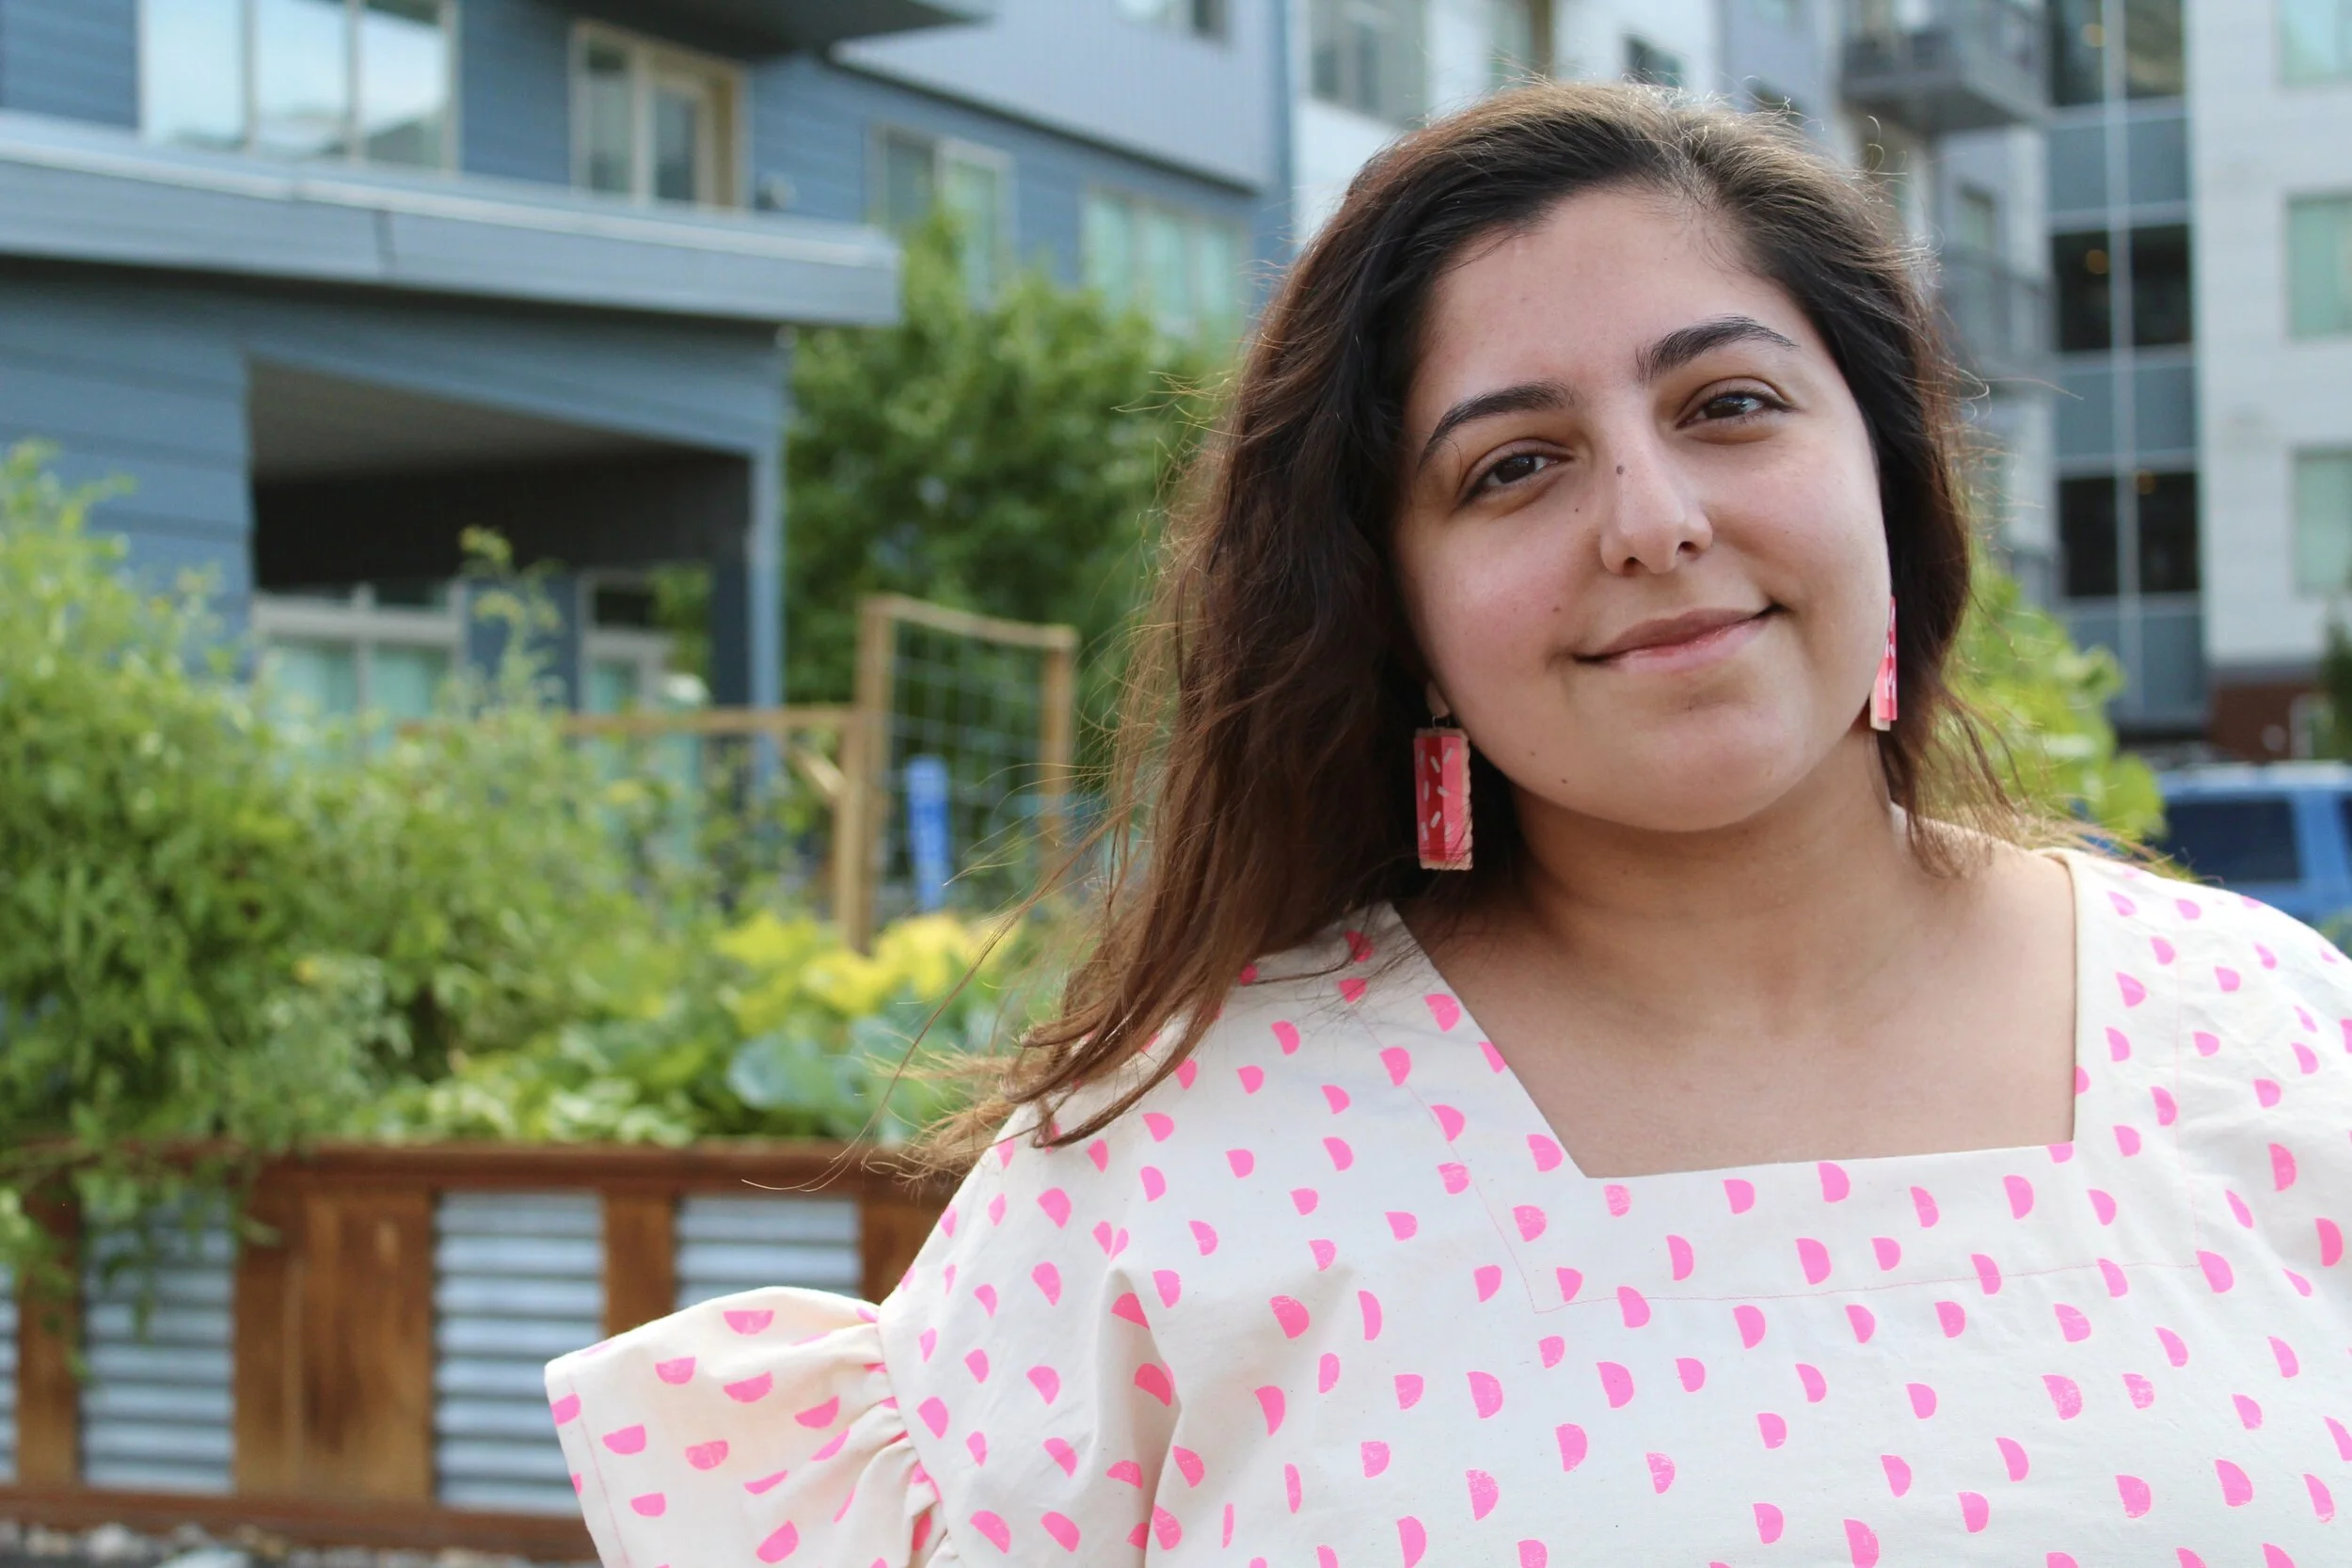
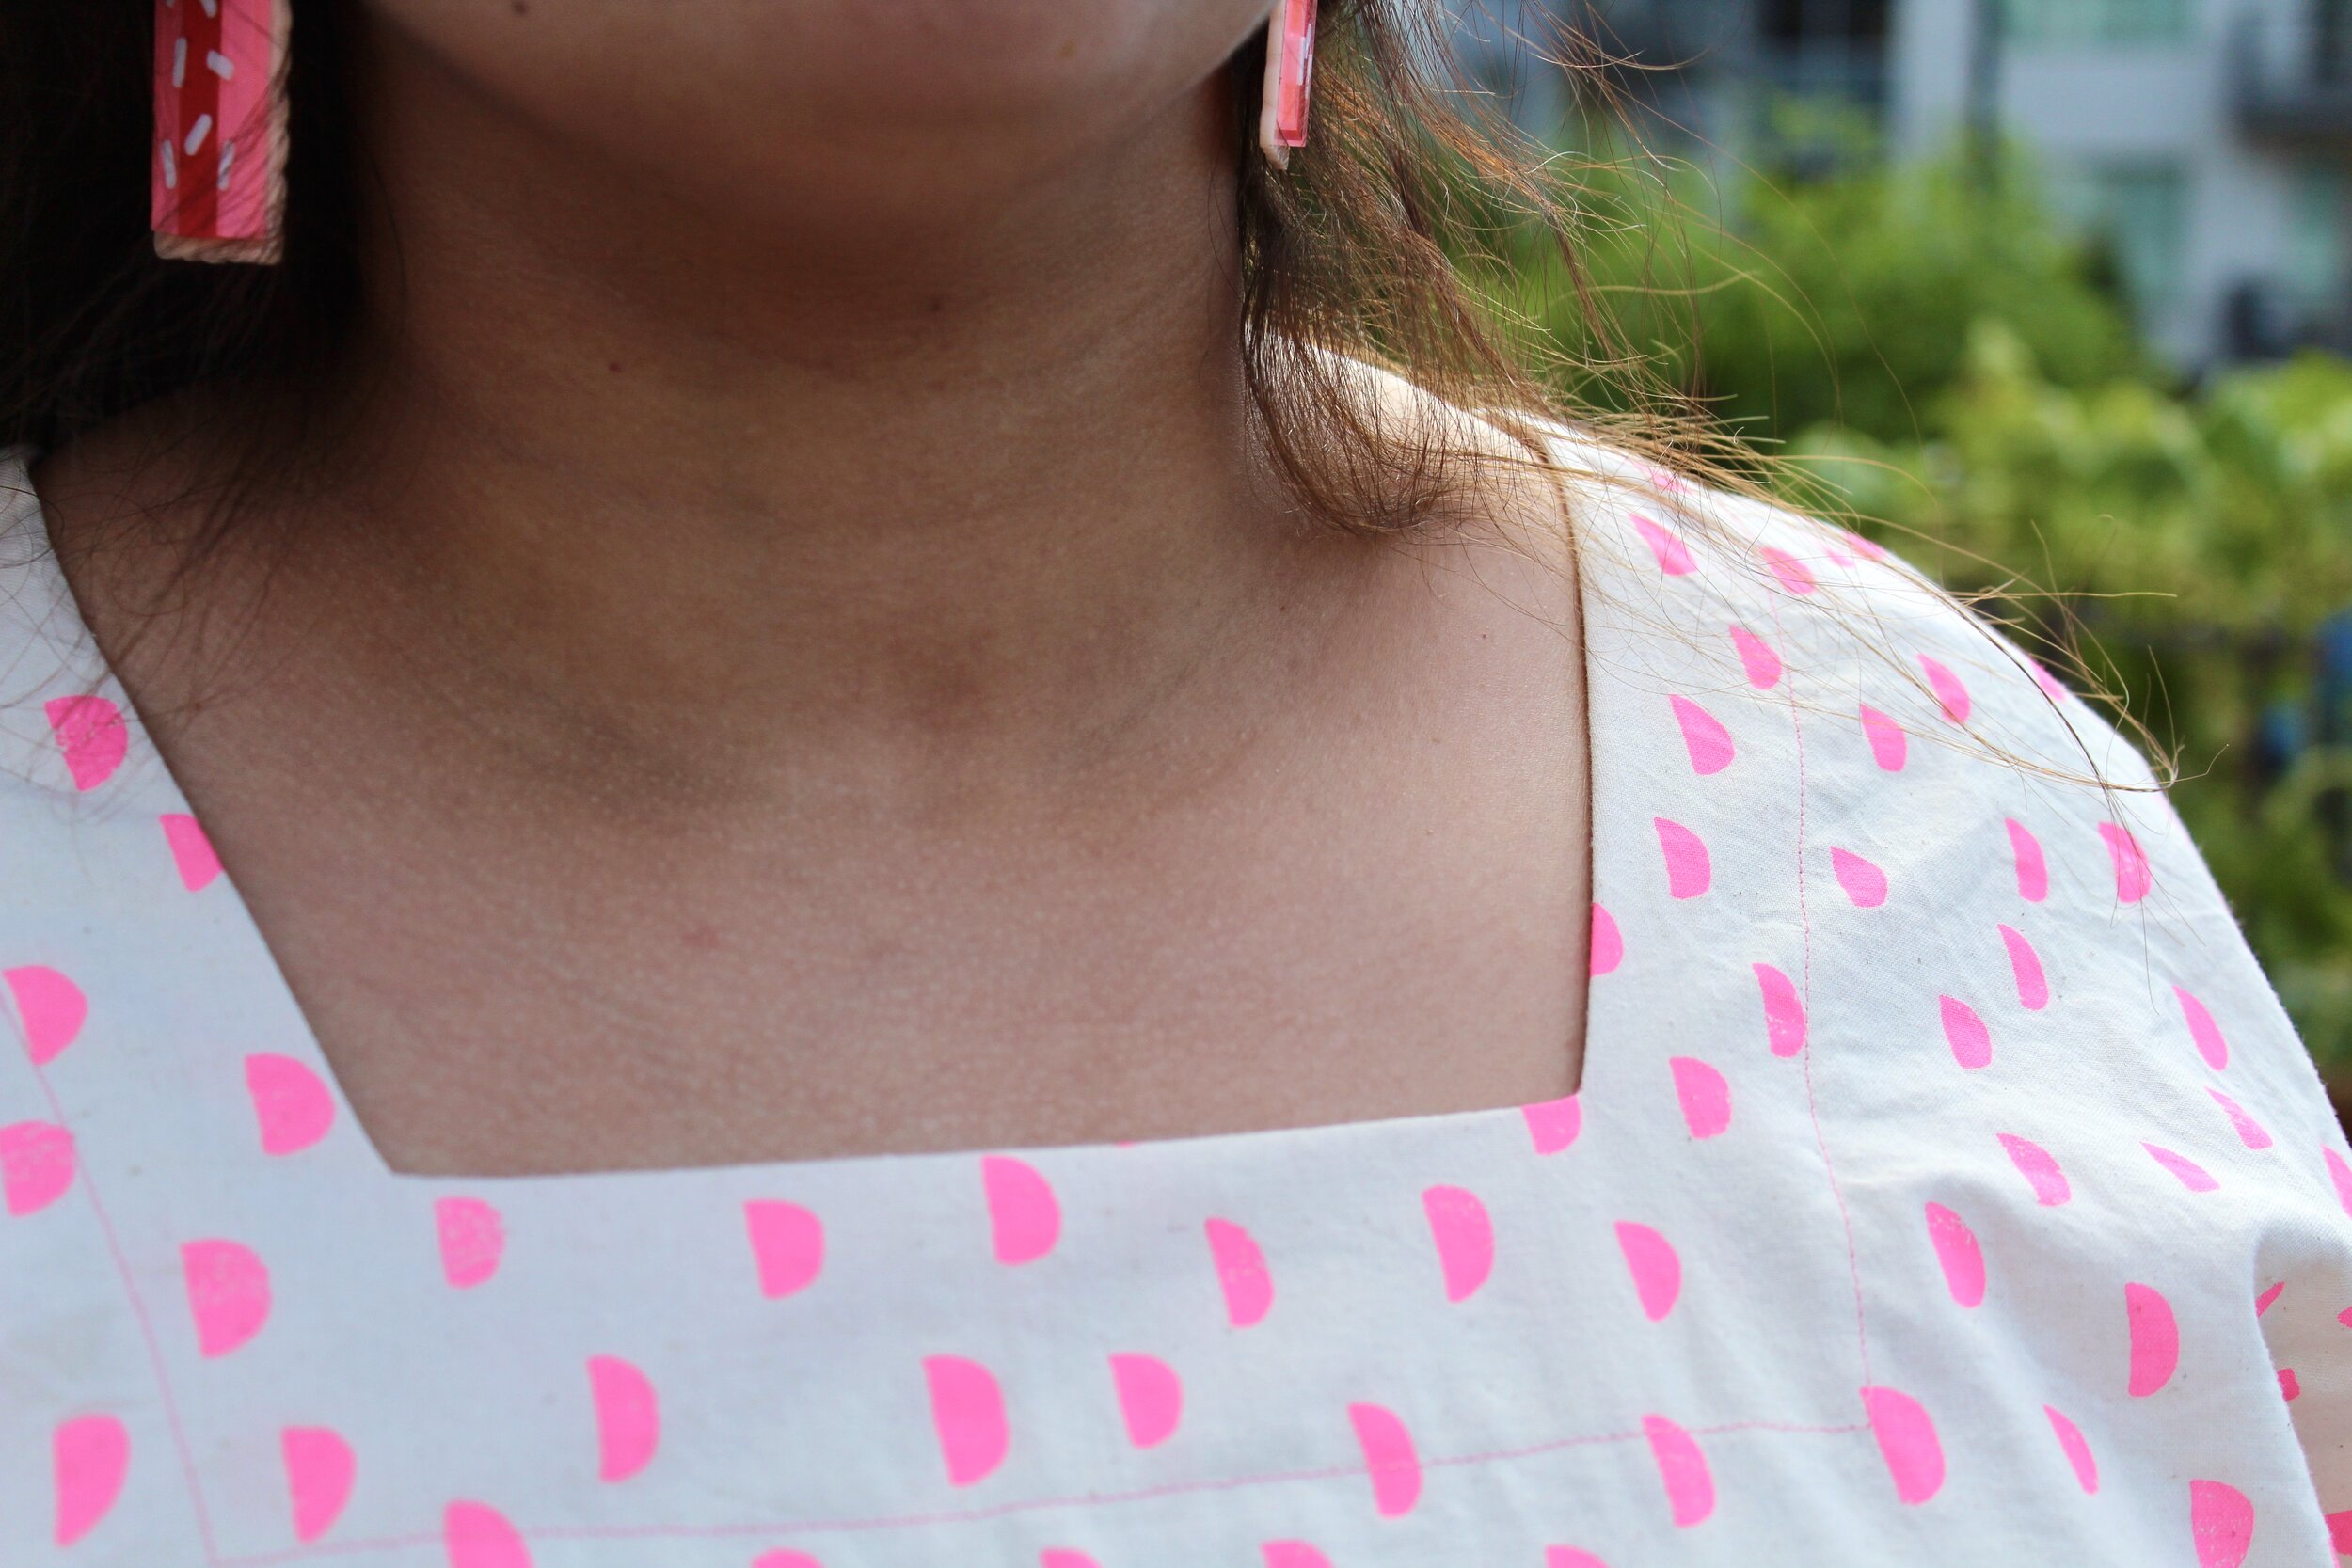
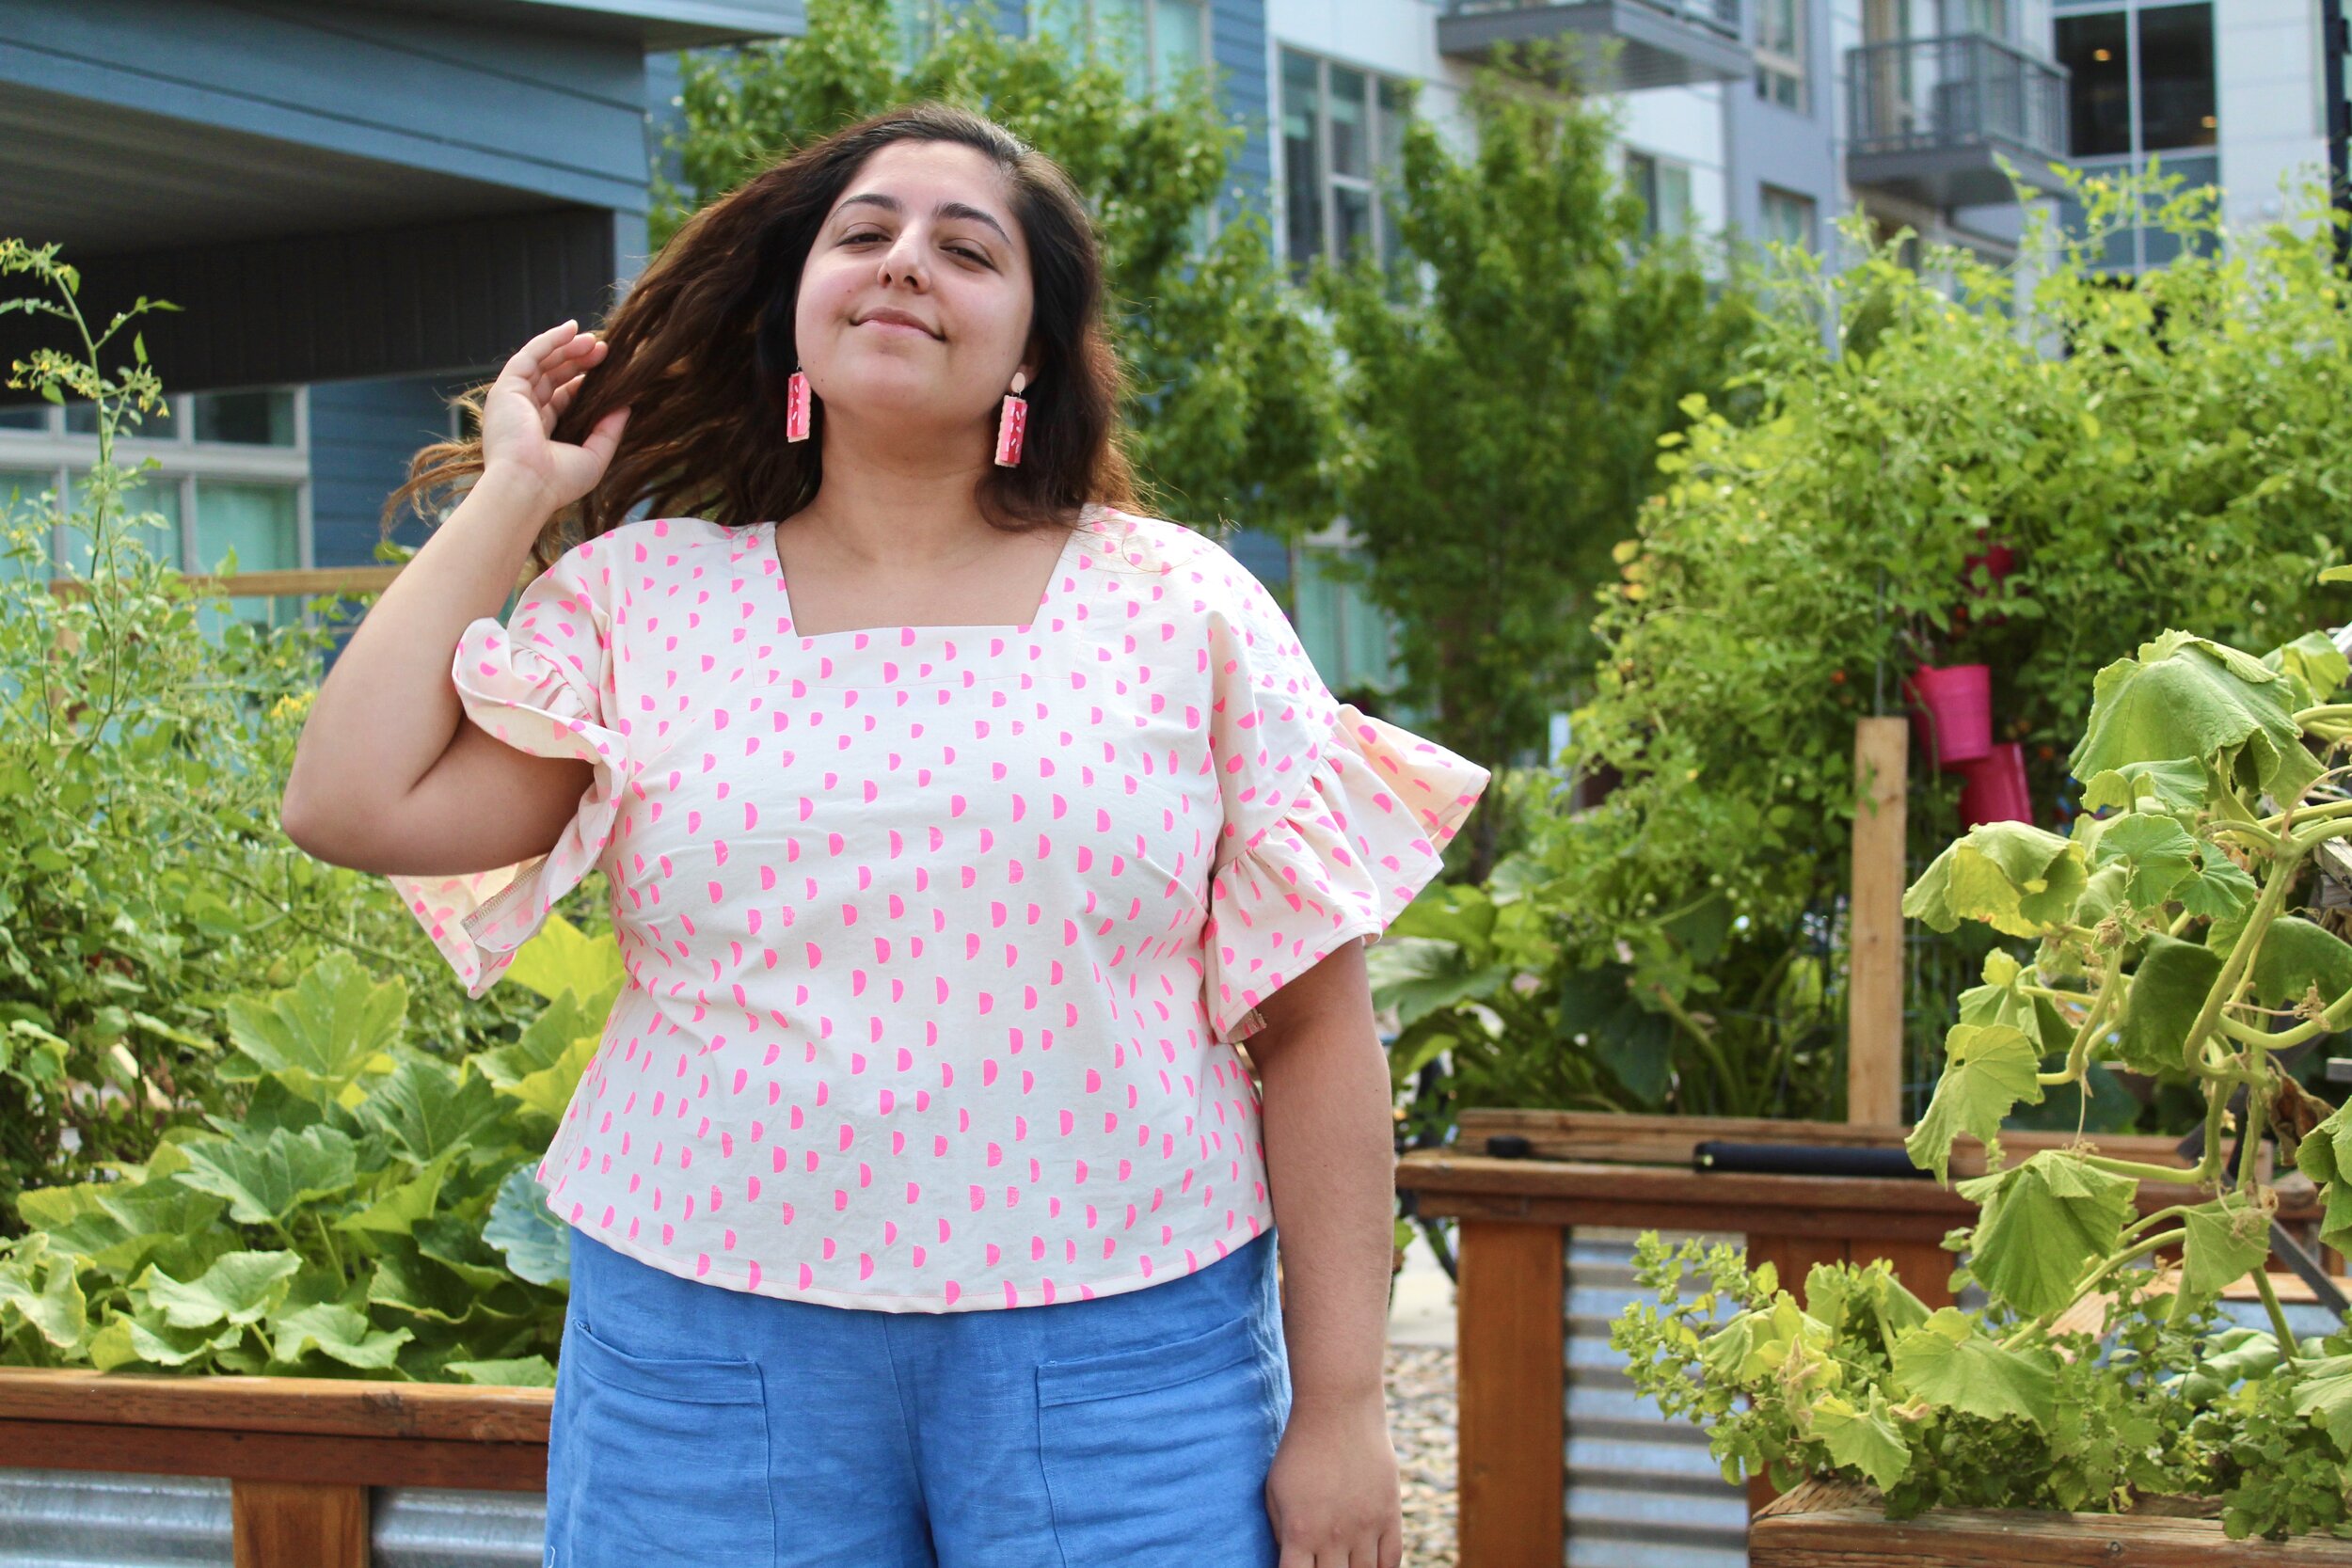
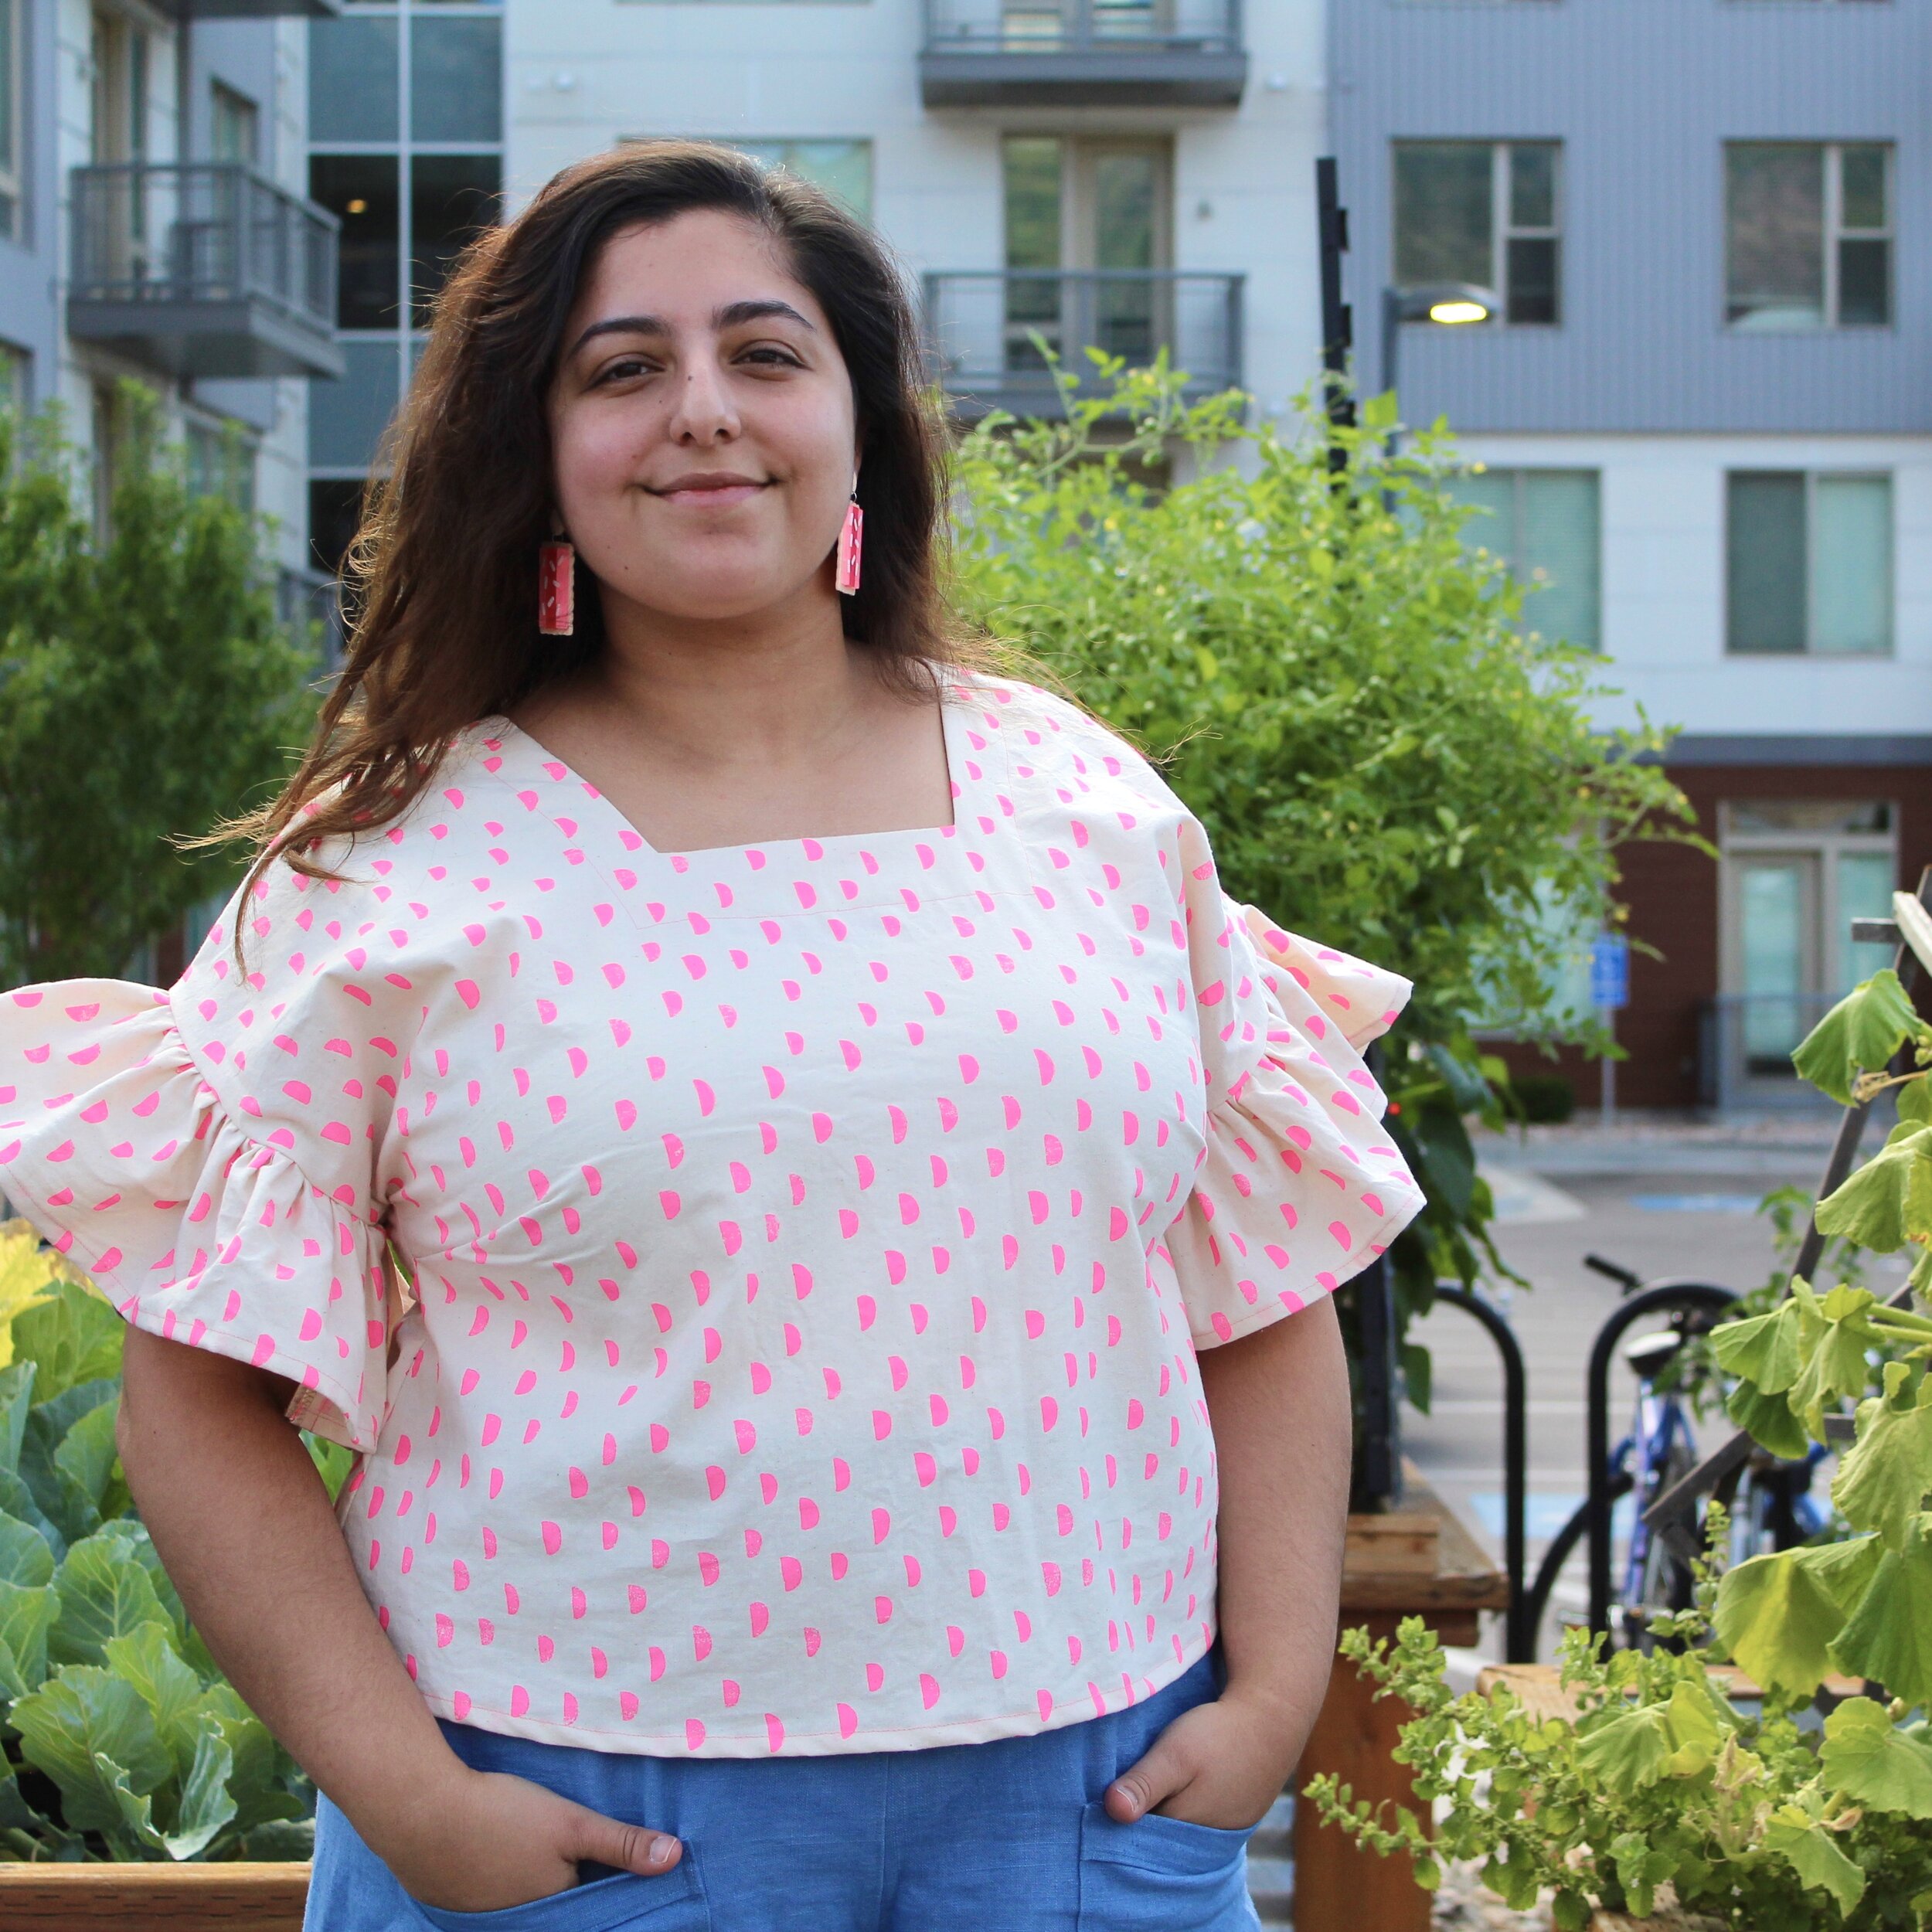
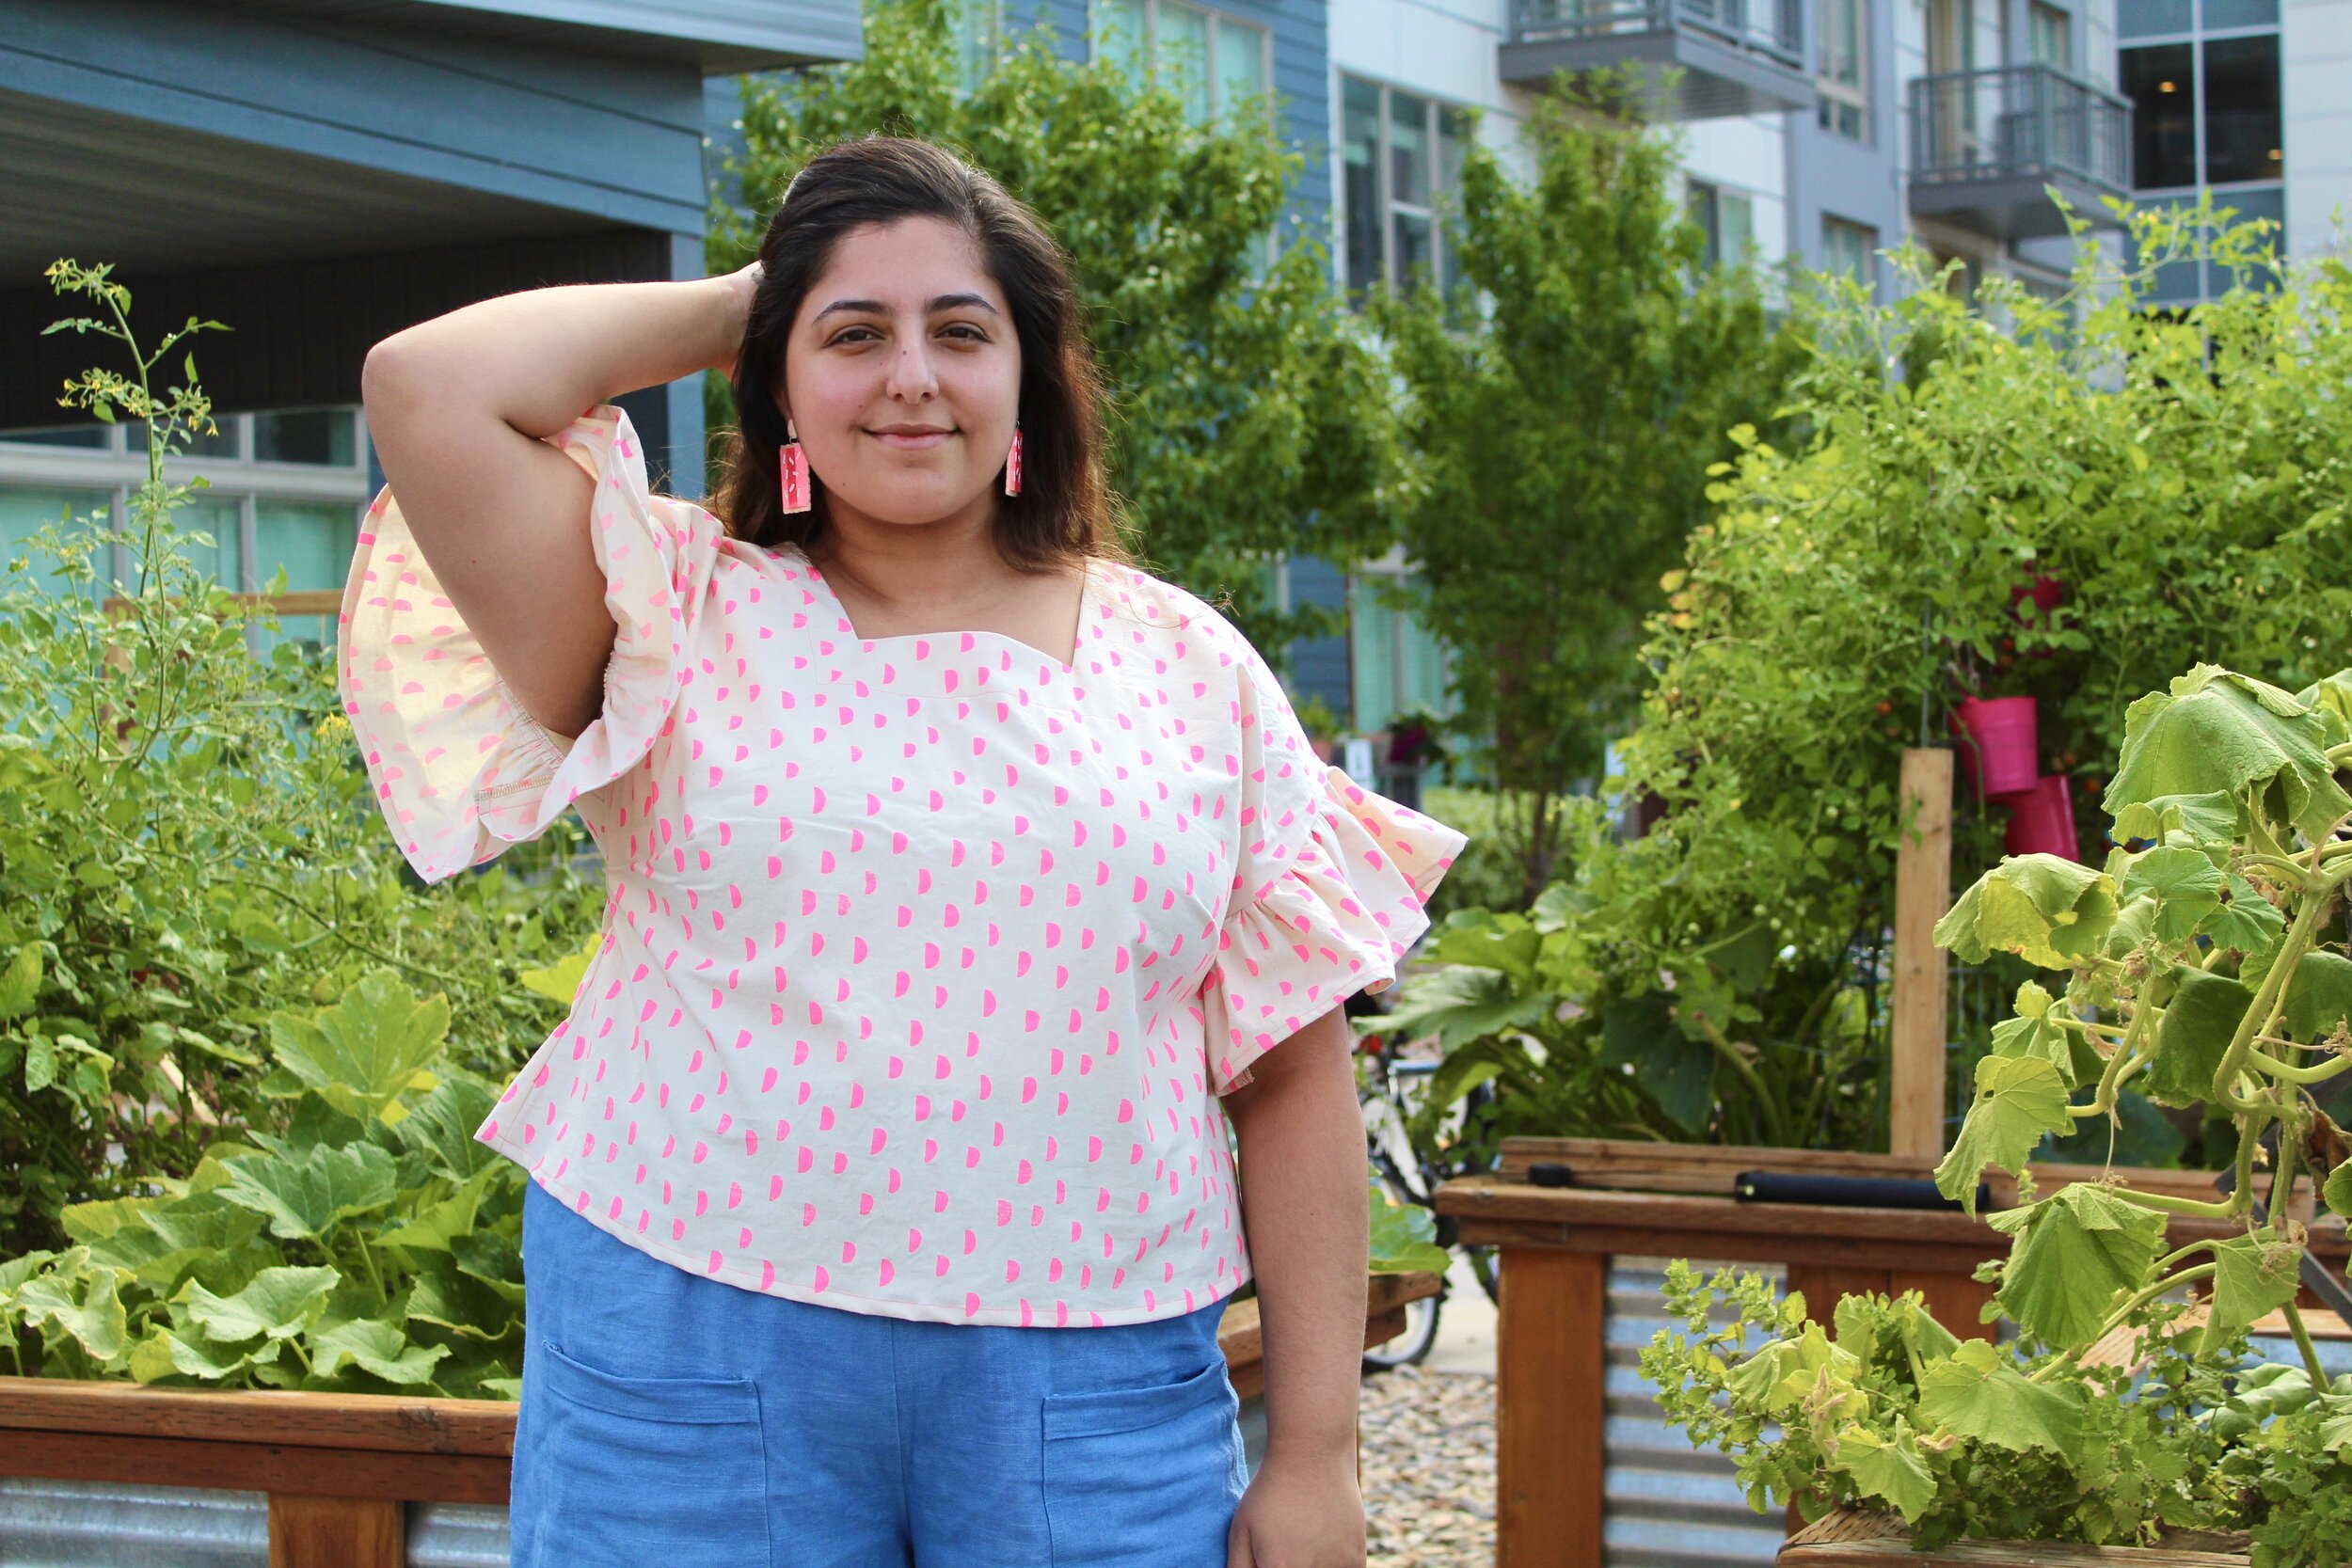
The silhouette is a beauty. Dolman sleeves, bust darts and who can forget the square neckline. And of course, Chelsea always has us covered in the instructions on how to alter the neckline depth and width since we’re all different beautiful shapes and sizes. Did I also mention the pattern comes in a/b and c/d cup sizes? For reference I made the XL graded to a XXL in the waist/hips in the c/d cup size. I could have made the straight XL but I like the looser fit.

My first version in the blue IKAT from Fabriclore is with no changes in the neckline and my second version in this amazing mid-weight unbleached cotton from Cotton + Steel. Specifically, another gorgeous design from Alexia Marcelle Abegg, called Moons from her Print Shop collection that I picked up from Harmony Provo. With my second version I added 5/8” in neckline depth and 7/8” in neckline width. Again, Chelsea comes up with the goods and if you need to adjust your neckline the instructions are in the instructions!

Now you’re probably thinking, why does the pink and white one have ruffles? That’s because your girl loves herself a good ruffle and I had spare fabric so I added it in. All I did was make a rectangle for my pattern piece. I did this by measuring my armhole, added in seam allowance (5/8”) and multiplied that by 1.75. I like that look of ruffle but you can do 1.5 for less gathers or 2 if you’re feeling frisky. That number there gives you your ruffle length. As for width, I tried on my top and had a looksie in the mirror and measured the existing sleeve to where I wanted it to sit and added in seam allowance for the hem and where the ruffles connects to the top. The seam allowance for the hem I added 1” for a double turn hem at 1/2”. For connecting to the top I did 5/8” to keep in consistent. To keep things easy I made my pattern piece to be cut on the fold so I didn’t have a huge rectangle piece laying around (I just divided my rectangle length by 2 and that’s what I drew and put on fold on one side).
Now to add the ruffle itself. I did two basting stitches with the longest stitch length on my machine to gather the ruffles. I had already pressed and hemmed it. I then attached it to the armhole gathering to match the armhole size. This was before the step to attached the side seams. Once I fit in my ruffles I sewed it in and then continued with the instructions as is. So a slight detour for a fun addition!
Overall, I can’t rave enough about this pattern. Super comfy, hackability at like 200% and just all round perfection. You definitely need to give it a go if you haven’t yet and if you’re feeling up for it let me know if you try the ruffle hack!